Installing a remote oil filter on a Nissan Chrysler SD22 marine diesel engine
Installing a remote oil filter on an SD22 transforms a maintenance nightmare into a routine task, but only if you avoid the three installation errors that can cost you an engine.
TLDR
- Upside-down filter mounting blocks oil flow and activates bypass mode, a common SD22 installer mistake that leaves your engine running unfiltered oil.
- Oil flow direction through remote lines is critical: reversed plumbing causes pressure loss and oil starvation that damages bearings.
- Hand-tightening plus one quarter turn is the correct torque spec, overtightening deforms threads and guarantees leaks on your next change.
The Access Problem Nobody Mentions at Survey
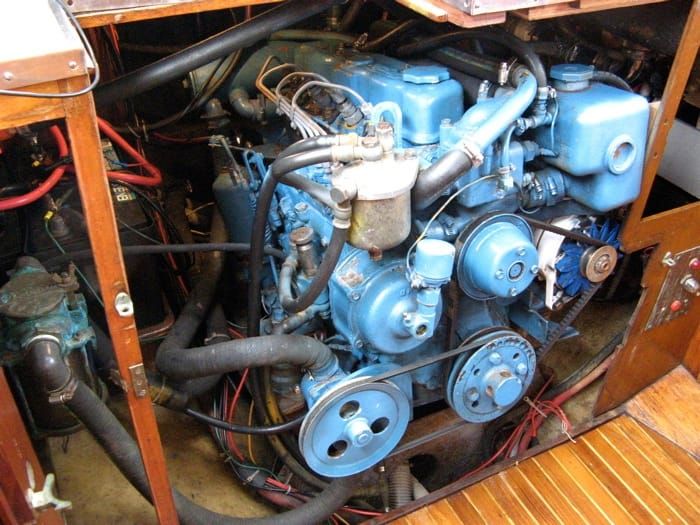
The Nissan SD22, a 2.2L marine diesel found in many 1980s-90s production sailboats including certain Catalinas and Pearsons, has a filter that sits where you need three knuckle joints and the wingspan of a ten year old to reach it. Standard mounting puts the canister against the engine block, tucked behind fuel lines and accessible only from an angle that requires removing your shoulder. This matters offshore because you will change this filter every 100 to 150 hours, not the 250 hour intervals printed in manuals written for stationary generators in climate controlled warehouses.
Remote mounting solves access. It also introduces three failure modes that will destroy your engine faster than the original tight clearance ever threatened to.
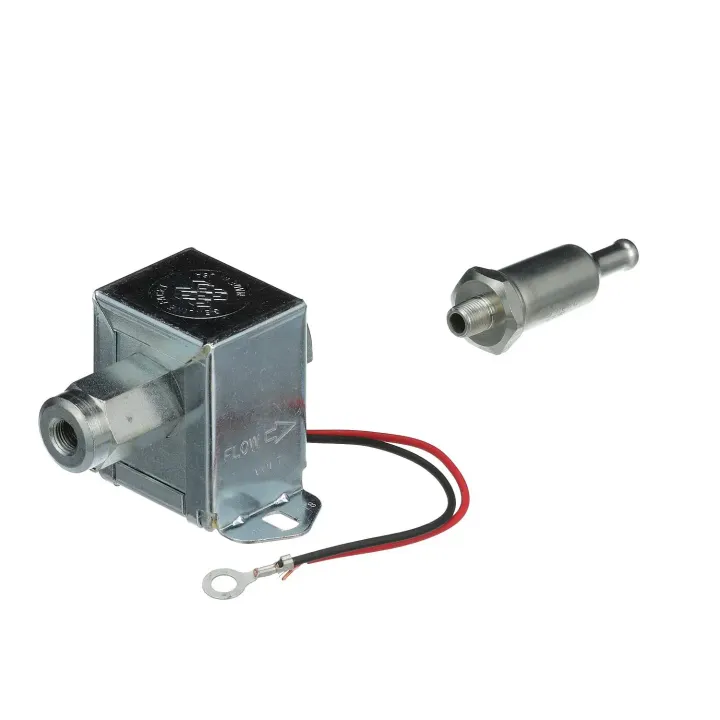
The Inverted Filter Mistake
Installers mount SD22 filters upside down with disturbing frequency. The filter housing has no obvious top or bottom marking, and the threaded mount accepts installation in either orientation. When inverted, the internal check valve, a spring-loaded gate that routes oil around a clogged filter, either blocks flow entirely or forces oil through the bypass circuit, which routes unfiltered oil directly to your bearings.
You discover this problem one of two ways. The quiet version: your oil pressure gauge reads normal, but metal particles accumulate in your pan until a connecting rod lets go far from the nearest machine shop. The loud version: oil pressure drops below the critical 20 psi threshold within minutes of startup, and you catch it before bearing surfaces weld themselves into expensive sculpture.
The correct orientation places the threaded mount at the top of the canister. Oil enters through the outer perforations, passes through the filter media from outside to inside, and exits through the center tube. Mark the housing with a paint pen before you walk away from the installation. You will thank yourself when a delivery crew or boatyard mechanic services the engine in your absence.
Flow Direction Will Damage Your Engine
Remote oil filter lines must route oil from the engine block through the filter and back to the engine. Reverse this flow and you create pressure loss and oil starvation that damages bearings.
The correct plumbing uses a sandwich adapter plate mounted at the factory filter location. Torque this adapter to 12-15 ft-lbs against the engine block. The supply line runs from the adapter's outlet port to the bottom inlet of the remote filter housing. The top outlet of the housing returns through a line to a tapped bung in the oil pan or to the location where you've relocated the pressure sender. This arrangement ensures the filter always fills from the bottom, preventing air pockets that would otherwise collect at the top of the canister and create vapor locks during startup.
Install a check valve in the return line to prevent the filter from draining when the engine is shut down. Without this valve, every startup begins with the oil pump pushing air through the system before pressure builds, exactly the dry running condition that accelerates wear.
Use 3/8 inch hose meeting SAE J1942 or ISO 6945 marine oil hose specifications. The SD22 operates at 50 to 57 psi at temperature, and you need hose rated to minimum 300 psi burst pressure to maintain the required 4:1 safety factor. Marine fuel hose is not oil hose. The compounds are different, and fuel hose will soften and weep in contact with hot engine oil. This weeping starts as a sheen you notice during engine checks and progresses to a drip that empties your sump into the bilge over a passage.
Secure lines at maximum 18 inch intervals per ABYC H-33 using ABYC-compliant stainless steel clamps with rubber isolation. The SD22 generates substantial vibration, and unsecured hoses work harden at the fittings, developing visible cracks and brittleness, until they fail. Route lines away from exhaust components and through areas you can inspect without disassembling half the engine bay.
Before first startup, fill the remote filter housing completely with clean oil, then crank the engine with the stop lever pulled to build pressure without firing. This priming step prevents the dry start damage you've just spent hours of careful installation trying to avoid.
The Gasket Problem That Starts On Installation
Dry gaskets pinch and leak. Every oil filter gasket requires a thin film of clean oil before installation. This oil fills surface irregularities and allows the gasket to seat evenly under clamping force. Skip this step and the gasket deforms into the threads rather than sealing against the flat mounting surface.
Old gaskets left on the mounting surface create a double seal that fails immediately under pressure. Remove the old filter and run your finger around the entire mounting flange. Old gaskets stick like decals and tear when you try to remove them. Use a plastic scraper, not a metal one that will gouge the sealing surface. A gouged mounting face leaks regardless of gasket quality.
Hand tighten the filter until the gasket contacts the mounting surface, then rotate one quarter turn further. This is 90 degrees, not "until it feels tight." Overtightening crushes the gasket and deforms the filter housing threads. You will discover this when the filter refuses to come off at the next change, and the housing tears away from the base plate while the threads remain stuck to the mount.
The Quality Problem Hiding In Plain Sight
Automotive filters do not belong on marine diesels. The difference is burst pressure rating and bypass valve setting. Automotive filters assume steady operating temperatures and clean fuel. Marine diesels operate in constantly varying conditions with fuel quality that ranges from acceptable to criminal depending on which island you last filled tanks.
Look for filters marked for marine diesel use with minimum 150 psi burst rating. When oil thickens during cold starts, the bypass valve opens to prevent filter media collapse. Automotive valves open at lower pressures, meaning your engine runs unfiltered oil during the exact conditions when particle contamination does the most damage.
I change filters every 100 to 150 hours based on operation in tropical conditions where humidity accelerates sludge formation and extended engine running under load. Oil analysis helps determine what your specific engine and operating conditions actually need. Annual changes regardless of hours if you operate the engine infrequently. Oil sitting in the filter oxidizes and forms varnish deposits that plug media before the next season begins.
The Installation Nobody Warns You About
Mount the remote filter housing vertically with the inlet at the bottom. Budget $300-500 in parts plus four to six hours for careful installation, and accept that you're adding hose connections that will need inspection every 50 hours. Remote filter adds convenience but trades the original configuration's simplicity for additional connection points in your oil system.
Use a remote housing rated for marine environments. This means aluminum or stainless construction, not painted mild steel that will corrode through in salt air. The housing must include a pressure relief valve set higher than your bypass valve pressure. Without this relief, a plugged filter can burst the housing rather than opening the bypass circuit.
Mount the housing where you can see the base for leaks and reach the filter without tools. If installation requires a filter wrench, you have mounted it wrong. Accessibility offshore matters more than aesthetic mounting in an invisible corner of the engine bay.
Install a drip pan under the filter housing per ABYC E-11.7 requirements for components containing oil.
Before each oil change, depressurize the system and exercise caution around hot oil that can cause serious burns. After installation, run the engine and verify no air bubbles appear in the return line during the first 60 seconds of operation. Monitor oil pressure, which should read 50-57 psi at operating temperature. Pressure below 20 psi means shutdown immediately.
Inspect all connections as religiously as you would inspect fuel lines. Zero tolerance for leaks in a pressurized oil system. The remote filter installation requires this monitoring discipline, but it delivers the access that makes 100 hour maintenance intervals manageable on a passage schedule.
By Wade Larson